An empty face wash tube can snap shut perfectly on a supplier’s desk. Fill that same tube with gel, let a little product collect around the outlet, and put it sideways in a parcel. A cap that felt secure in the first demonstration may now leave a sticky ring inside the lid or a streak on the carton. If you are buying the packaging, you need to know whether the closure, its connection to the shoulder, or the heat seal let the gel escape.
This face wash flip-top cap leak test is a sample approval plan for packaging buyers, quality teams, and contract fillers. It covers a 100 mL daily cleanser in an extruded PE tube with a molded shoulder, straight heat-sealed tail, and hinged flip-top. It also shows how to carry the approved configuration into the purchase order. For the wider choice of formats, start with facial cleanser tube packaging.
Start With Filled Tubes That Represent the Order
Identify the Closure as an Assembly
Ask for the tube, shoulder, and cap drawings with their revision numbers. The little plug under the lid usually seals against the opening it fits into. A separate connection attaches the closure to the tube neck. Those are different interfaces. Ask the supplier to identify each one and show how the cap is seated. If a closure has a tamper seal, valve, or insert, record that piece too. The commercial name of a cap is useful shorthand, but it cannot tell your filler which parts were actually tested.
Hold the Product and the Fill Constant
Compare two versions using the same lot of cleanser, the same target fill, and the same filling and sealing process where possible. A change in fill level changes the room available for product and air to move when someone squeezes the tube. Formula temperature at filling and storage conditions can also affect what you see. Write down the batch, fill mass, storage position, and time of each check. Assign each tube a sample code that stays with it from filling to the last photograph.
Get the Sealed Dimensions From the Filler
For 100 mL face wash tubes with flip-top caps, capacity is only one line in the brief. Ask for the dimensions after the proposed cap and seal are fitted. Record the finished length, body width or diameter, and cap footprint. Those dimensions determine where the carton or pouch touches the tube. An empty sample with an unsealed tail can mislead a carton designer because the finished tube changes shape at both the shoulder and the seal.
| Location | Typical observation to record | Follow-up on the next sample |
|---|---|---|
| Under the hinged lid | Product around the outlet or sealing plug | Compare clean and normally used caps with the same closure revision |
| Between closure and shoulder | New residue at the cap base or neck connection | Check the seating method and use a fresh sample to isolate the connection |
| At the sealed tail | A wet edge or a line of product across the seal | Ask the filler to check tail contamination, seal settings, and trim |
| On the tube wall | A mark on a fold, puncture, or rub point | Compare the filled tube with an undamaged control and check the carton contact point |
Check What Happens After the First Opening
Use One Clean Sample and One Normally Used Sample
Begin with closed, externally clean units. The clean set helps you see whether product escapes before a customer touches the tube. For the used set, dispense a normal amount, close the lid, and follow the routine you expect in practice. If the user usually wipes the opening with a finger or closes it without wiping, agree which behavior to simulate and record it. Keep those units separate. Cleaning every outlet before every cycle can hide residue that matters in a daily bathroom routine.

Try the Closure With Wet Hands
A hinged flip-top cap needs a thumb access point that you can find without turning the whole tube around. Have several people open and close the sample with wet hands if that reflects use. Ask them to check when they feel or hear the lid engage. If a lid can sit nearly flush without latching, note how easy it is to miss that position. Start with a full tube and repeat the check near the end of use, when people tend to press harder on the sidewall.
Agree on a Meaningful Opening Cycle
Choose a test cycle that represents how your brand expects the cleanser to be used, including pauses between uses and the way the pack is stored. Agree with the supplier on the number of cycles and the conditions before you see the result. Check for changes at intervals rather than inspecting only at the end. Look for changes in the hinge, the latch, and the sealing contact. The cycle count belongs in your project record and needs to be justified for this closure and use case.
Photograph the First Sign of Residue
Set clean witness material under each unit in the agreed orientation. A wet mark next to the cap can indicate a leak, product remaining from an earlier dose, or water left from the wet-hand check. Photograph the unit and mark the suspected origin before wiping it. Then repeat the condition with a fresh, dry unit to see whether the location is reproducible. Compare cap-down, sideways, and upright positions if each one matters to your sales channel. Use the same conditioning period when you compare designs.
Test the Parcel and the Bathroom Separately
Pack the Real Shipping Configuration
The cap in an ecommerce carton experiences pressure from the other items around it. Put the filled tube in the actual carton, including dividers or bundled products. Identify whether the carton presses the lid open or pushes the closure against the shoulder. Check the package again after a handling trial that represents your channel. A shipping and filling leak guide can help the team assign a failure to the right part of the pack.
Compare Warm and Cool Conditions Your Team Can Define
Have the formulation and quality teams pick the temperatures and dwell times that matter to your route and storage conditions. Record the actual conditions and let samples reach the planned condition before making a comparison. If a colder gel demands more force to dispense, check whether users put their fingers on the lid or squeeze the tube before it is fully open. A higher squeeze force is a reason to investigate both the outlet size and body stiffness, with one change at a time.

| Check | Record | Decision before ordering |
|---|---|---|
| As delivered | Lot, fill mass, cap and shoulder revisions, seal appearance | Confirm the units represent the proposed configuration |
| Used in bathroom | Wet hand opening, lid closure, residue after repeated use | Agree which residue and closure defects fail |
| Stored cap-down or on side | Position, condition, duration, and location of any product | Repeat suspected leak with a clean, matched unit |
| Packed for shipment | Contact points, carton orientation, condition after handling | Confirm the carton does not interfere with the cap |
| After a design change | Part changed and previously accepted checks affected | Repeat the checks that the change can influence |
Write a Purchase Order the Factory Can Follow
Attach the Approved Closure and Seal Details
Keep the accepted assembly drawing, cap color, resin specification, approved print proof, and retained filled sample together. Include the seal style and the filler’s validated settings in the project record. A straight seal and a neat batch code help inspection, but appearance alone is one check. Ask how the supplier will flag a closure or shoulder change, and who must review the substitute before it can enter production. Request production-representative samples if the first sample used a stock cap or a temporary print.
Keep Printing Clear of the Handling Areas
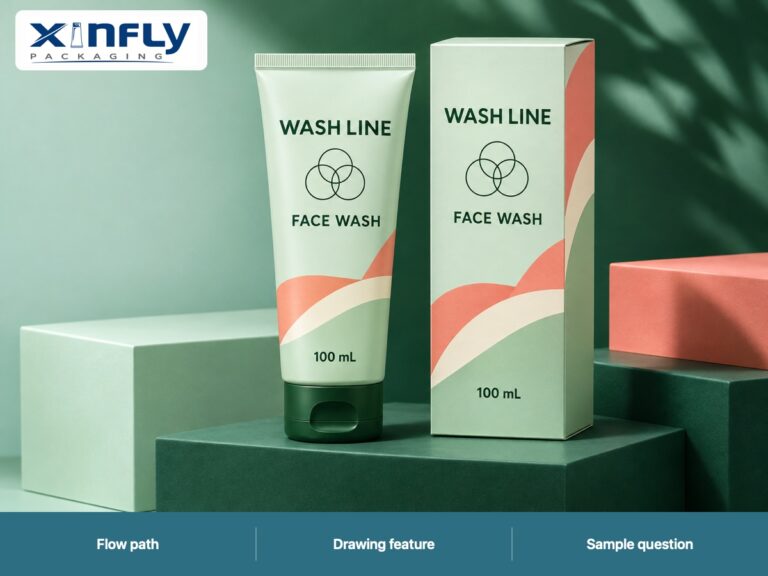
The illustration shows simple single-color printing on an extruded PE tube. In a real order, ask which decoration process matches your artwork and exact tube finish. Place critical text outside the areas where the user’s fingers rub the tube repeatedly, or validate its legibility there. Ask for a printed and filled sample to check how the design lines up relative to the cap’s thumb tab. If a front-facing tab is part of the brief, check cap orientation on the filling line as well as on the artwork file.
Inspect a Second Delivery Against the Same Reference
Make a simple release sheet for the first production lot. Include one space for each leak location and a separate field for damage found before filling. Keep a set of empty face wash tubes from the shipment so a filler can compare the as-received cap and tail with any affected finished units. Set aside a filled and sealed unit with the approved cap seated correctly. When a second delivery arrives, compare its part codes, dimensions and closure action to those references. If the supplier sends a new batch of caps on an unchanged drawing, note whether your contract calls for a repeat of the closure check.
Compare Quotes With the Same Approval Scope
Request prices for the same nominal fill, body construction, closure revision, decoration, inspection responsibilities, and packout. Clarify whether pilot filling, additional cap samples, and second proofs are included. A lower unit quote is easier to evaluate when you can see exactly which parts differ. If a supplier suggests a lower-cost cap, ask for a paired filled sample, and compare it using the same conditions and record. Send the packaging team your test brief when you request samples from Xinfly Packaging.
Frequently Asked Questions
Can I run the leak test using water?
Water can help with an early comparison, but use the intended cleanser for the approval. Different flow and residue behavior may change what happens around the outlet and lid. Keep surrogate tests in a separate record.
Should a clean tube and a used tube have the same acceptance criteria?
Define both in the project plan. A filled pack arriving with product outside its closure may fail even if a small amount of residue on a normally used dispensing surface is expected. Define the locations and observations that count for each condition.
How do I tell if the tail seal caused the problem?
Start with a clean unit in a known orientation. Photograph the tail and cap independently, then confirm the first wet point. If the tail is implicated, have the filler review the seal settings and look for product where the layers were joined.
Do we need to test a new cap color?
Ask whether only the colorant changed or whether the supplier also changed the resin, tool, or part source. Decide with quality which checks could be affected, then compare production-representative parts with the approved set.
What should the supplier send with a sample for a new 100 mL cleanser?
Ask for the identified body, shoulder and cap, their current drawings, the fill and finished dimensions, the print specification, and any known differences between the sample and the quoted production pack.
Conclusion
A useful face wash flip-top cap leak test follows the filled tube through its actual bathroom routine and parcel configuration. Keep cap, neck, tail, and carton observations separate, agree on pass criteria before comparing samples, and put the accepted revision in the order. That record lets your supplier and filler repeat the decision when the next lot arrives.