Published: .
A clear decorative cap can make a cream tube look polished on the sample table. It also gives the buyer a surface worth protecting through assembly, packing and delivery. When marks appear on arrival, the first question is often whether the cap material is wrong. The more useful question is where the contact occurred and whether the proposed packing controls it.
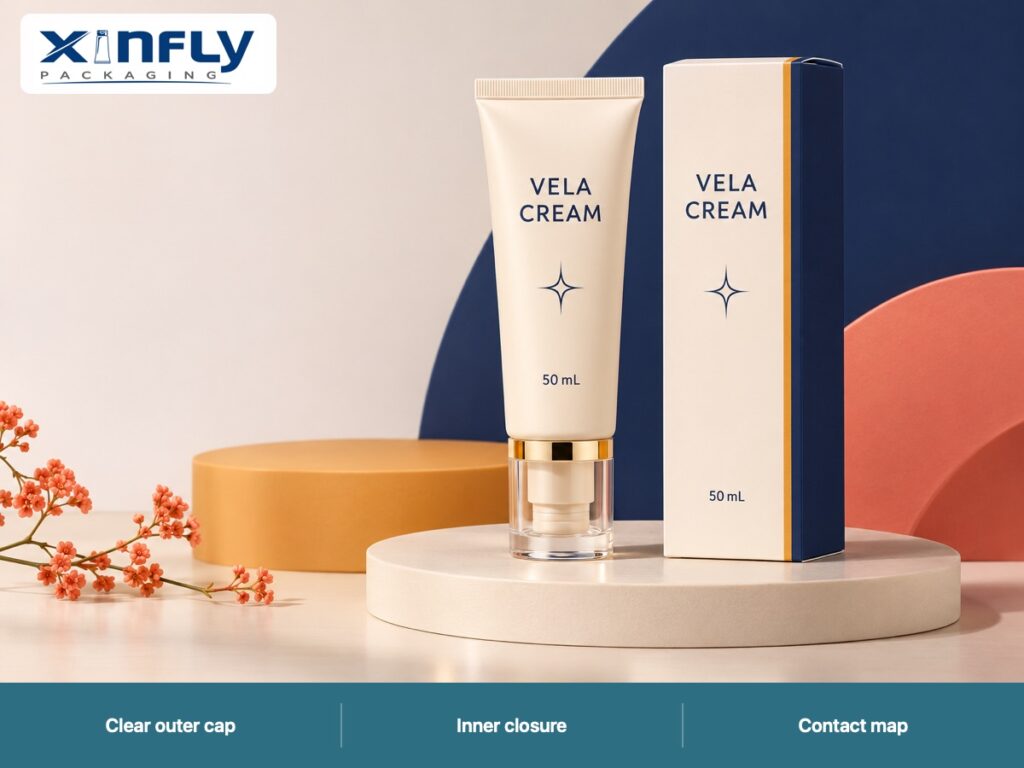
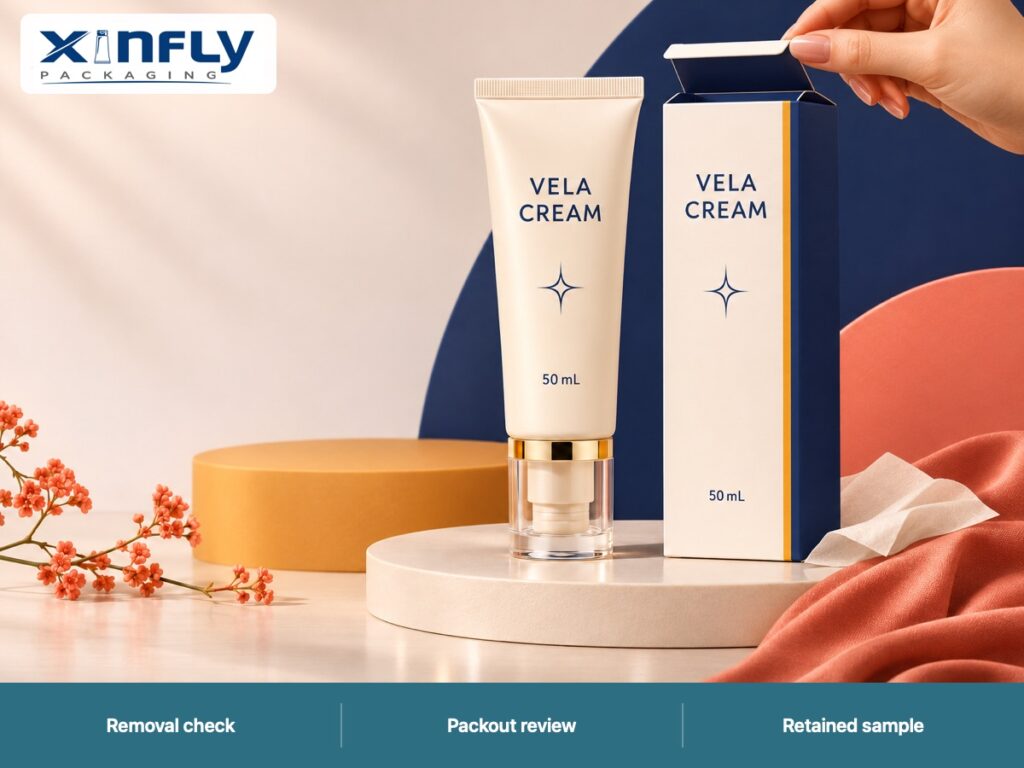
An acrylic cap tube protective packing check helps separate component appearance from packout performance. The illustrated VELA CREAM concept uses a 50 mL ivory PE tube, molded shoulder, straight heat-sealed tail, navy one-color screen print and a cylindrical clear acrylic outer cap with a cream inner closure and gold-tone collar. Its printed carton carries the matching name and star motif. This is a design illustration, not an existing customer pack or a scratch-test result. Review acrylic cap tubes with the supplier, then develop a packing trial for the actual assembly.
Map the Surfaces Before Choosing Protection
Identify the Decorative and Functional Parts
Ask the supplier to identify the clear outer shell, inner closure, collar and neck connection on the drawing. A visible mark on the outer shell and a damaged closing surface are different concerns. Record them separately. A visually acceptable outer cap does not establish closure integrity, and an unattractive scuff does not by itself identify a sealing problem.
Confirm the actual materials and finishes in the proposed cap. The term acrylic cap can be a useful product description, but it may not explain every part in the assembly. Ask which surfaces are coated, decorated or exposed. The protective packing proposal should correspond to those parts rather than a generic clear-cap photograph.
Mark Potential Contact Points
Look at where the cap can touch the tube beside it, the carton, an insert, a packing tray or a worker's handling surface. Include the collar and cap base. A carefully wrapped sidewall can still leave another visible surface exposed. Sketch the likely contact points on a simple packout drawing before adding layers of material.
Ask how the pack moves between cap assembly and final packing. If the cap is already marked before it reaches the retail carton, changing the carton may not resolve the issue. Keep a clean sample from the earlier stage so later findings can be compared with a documented baseline.
Agree What the Buyer Will Inspect
Define the viewing conditions and visible areas with the brand and quality team. State whether the pack is judged at normal handling distance, under agreed lighting, or through an additional close inspection. Do not switch between casual viewing and strong magnification without recording the change. A clear acceptance reference makes the discussion more useful than an instruction to deliver perfect caps.
| Surface | Observation to record | Packing question |
|---|---|---|
| Clear outer shell | Scuff, haze or localized contact mark | What touches the shell during handling and transit? |
| Collar | Mark on the visible decorative band | Is the collar protected at its contact edge? |
| Cap base | Contact with tray or carton bottom | Does the support create a concentrated load? |
| Inner closure | Seating and functional condition | Is the decorative protection affecting engagement? |
| Tube body | Print or finish marks near the cap | Does protection transfer contact to the body? |
Compare Protection Options on Real Parts
Evaluate Tissue or Sleeves as Candidates
A tissue wrap, sleeve or separator may be considered, but it should be evaluated on the actual cap and finish. Ask the supplier to identify the proposed material, how it is applied and how it is removed. Do not assume that any soft-looking sheet is suitable. Check for visible fibers, transfer, handling difficulty and interference with the carton.
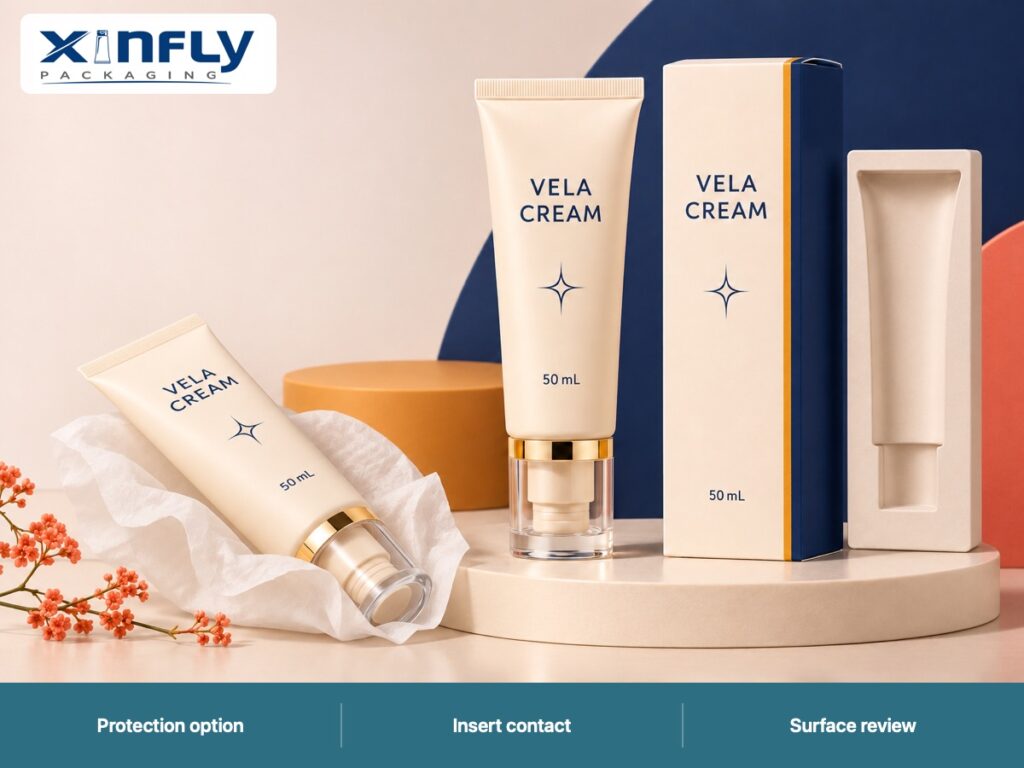
The VELA CREAM detail illustration shows a tissue arrangement as a discussion option. It does not prove that the tissue protects the cap or is suitable for a particular finish. In a project, keep an identified sample of the proposed protective material and trial it with the complete decorated pack.
Check the Insert and Carton Geometry
Place the filled, sealed tube into the proposed insert and folded carton. Look at the cap's support points and the clearance around the outer shell and collar. A tight fit may limit movement, but it can also create repeated contact at one edge. A loose fit may allow a different motion. Record the actual contact rather than assuming either arrangement is automatically better.
For face cream tube packaging, confirm the finished tube dimensions before freezing the insert. A tail-trim change or alternate cap can alter the way the pack sits. Send the same assembly drawing to the tube and carton suppliers so protection is designed around one version of the product.
Include Removal in the Review
Ask someone to remove the tube using the intended carton opening. Observe where they grip the pack and whether the protective material catches on the collar or cap. If removal requires twisting the decorative outer shell, ask the supplier whether that motion is appropriate for the assembly. A pack that arrives looking good can still be frustrating to unpack.
Keep the printed carton in this review. The VELA CREAM concept uses ivory, navy and a warm decorative stripe, but a real carton needs its own material, print and fit approval. A matching design alone does not establish that its internal surfaces are suitable around the selected cap.
Separate Initial Marks From Transport Changes
Photograph the Starting Condition
Before a handling or shipping trial, identify and photograph each sample. Record the tube, cap, collar, protective material, insert and carton versions. Inspect the same visible surfaces at the beginning and end. Without the starting record, a supplier may reasonably ask whether a mark was already present before the packout trial.
Use consistent light and camera position. Take a normal-view image as well as a close detail when needed. Keep the photograph connected to the sample ID. A folder of attractive product images is less useful than a few repeatable views of the exact specimens that moved through the process.
Use a Relevant Handling Sequence
Discuss the expected route with the supplier, warehouse and quality team. It may include factory packing, export shipping, distribution, retail handling and consumer unboxing. Agree an appropriate evaluation program and acceptance criteria for that route. Do not treat a few hand shakes of a carton as a universal transport qualification.
A small internal trial can still help compare prototype packing options if its limited purpose is clear. Use the same sample preparation and handling sequence for the alternatives. If a formal distribution test is required, ask the responsible laboratory or quality team to select and document the method rather than inventing a pass claim from the illustration.
Change One Packing Feature at a Time
Where practical, compare a baseline with one controlled change: a separator, a different insert contact, or an identified wrap. If the cap, carton and protection all change together, describe the result as a new packing configuration. Do not attribute any improvement to one component without a comparison that supports that conclusion.
Investigate Marks by Location
Compare the Pattern With the Contact Map
After the agreed trial, inspect the same areas and compare any new marks with the proposed contact points. A repeated mark at the collar edge may suggest a different investigation from a broad haze on the shell. Describe the observation and ask the supplier to examine the likely interaction. The pattern can guide the next step without proving the cause by itself.
Keep affected samples and the packing materials together. Removing a tube from its insert and discarding the insert can lose evidence about where contact occurred. Record which side of the pack faced each surface and whether the protection moved or folded during handling.
Keep Appearance and Closure Checks Separate
Review cap engagement and the filled package under the project's separate closure program. A wrap should not prevent proper closing or conceal a seating issue. If the assembly is opened for inspection, record that action before assessing later findings. The decorative shell, inner closure and tube neck need clear identities in both records.
If a supplier proposes a new cap finish to reduce visible marking, request the revised part specification and sample. Review the appearance, fit and protection again. A finish change may affect more than the surface the buyer first noticed. Do not approve an unnamed substitute simply because it looks similar in a photograph.
Review the Tube Decoration Too
Protection around the cap can contact the body or printed artwork. Inspect that area alongside the clear shell. Confirm the tube printing and decoration process on the selected PE body and finish. A successful cap-appearance review should not hide ink transfer or a new mark on the tube's principal panel.
| Stage | Evidence to retain | Decision before release |
|---|---|---|
| Starting condition | Sample IDs and consistent surface photographs | Were the evaluated parts acceptable before packing? |
| Protection proposal | Material and application method | Does the proposed protection fit this cap and carton? |
| Handling trial | Route, method and configuration record | Is the comparison relevant and repeatable? |
| Post-trial review | Contact map, retained pack and observations | Which differences need investigation or another trial? |
| Final release | Approved assembly and packout revisions | Can the supplier repeat the accepted configuration? |
Put the Accepted Packout Into the Order
Quote the Complete Protection Scope
Ask for a quotation that identifies the cap assembly, body, decoration, protective material, insert, carton and packing labor where applicable. Compare the same quantity and delivery assumptions across suppliers. A low component price is hard to assess when one offer includes individual protection and another assumes bulk contact packing.
Request separate costs for development, additional samples or changed tooling if those are needed. Do not infer a standard MOQ or lead time from the concept. The final commercial scope should follow the selected assembly and packout, with open assumptions stated clearly.
Keep a Physical Reference for Repeat Orders
Retain the accepted tube, cap, protection and carton together with the release record. Identify changes that require review, including cap source, finish, collar, insert geometry, protective material or packing arrangement. An invoice referring to a 50 mL cream tube does not preserve all those decisions.
When empty squeeze tubes for face cream arrive for a later run, compare their identified components and packing with the reference. Record any difference before the parts are mixed into production. A clear receiving question is easier to resolve while the supplier can still identify the relevant shipment and material versions.
Discuss the Contact Problem With Xinfly Packaging
Share the formula type, nominal fill, tube drawing, cap preference, decorative finish, carton proposal, route and photographs of the surfaces you want to protect. Ask for identified samples through Xinfly Packaging's sample development process. Send the packaging team your acrylic-cap brief with a contact map and proposed acceptance review. That gives the discussion a practical target beyond requesting a more premium-looking cap.
Frequently Asked Questions
Does a clear cap need individual wrapping in every order?
That decision depends on the actual assembly, finish, packout and handling route. Compare suitable protection options on identified samples instead of assuming one arrangement fits every decorative cap.
Is a visible scuff evidence that the inner closure failed?
Not by itself. Record the affected surface and review functional closing and filled-pack behavior separately under the project's agreed method.
Can a tighter carton eliminate movement marks?
It can change movement and contact, but the result needs review. A tighter fit may introduce another contact point or make removal more difficult.
Are prototype handling trials equivalent to formal shipping tests?
No automatic equivalence is claimed. Use an internal trial for its stated comparison purpose and have the responsible quality team or laboratory define any formal distribution program required.
What should trigger a new packout review?
Review changes to cap source or finish, collar, tube dimensions, protective material, insert, carton or shipping arrangement. Repeat the checks affected by the changed configuration.
Conclusion
An acrylic cap tube protective packing check follows the visible surfaces from initial assembly through packing, handling and unboxing. Identify the contact points, compare real protection options, retain starting-condition evidence and separate appearance from closure performance. Xinfly Packaging can review the proposed pack and sample route when the brief identifies the actual cap, carton and handling conditions.